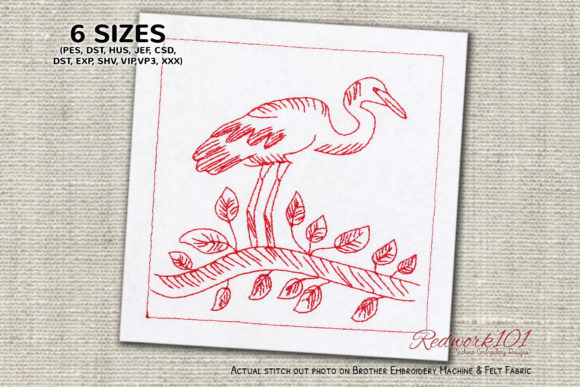
Flying Bird Redwork Design
There is a specific kind of joy found in the simplicity of redwork embroidery, and the Flying Bird Redwork Design stands out as a timeless example of this craft. Unlike complex, multi-colored digital art that can sometimes feel overwhelming or overly busy, redwork relies on clean lines and a single thread color to create a striking visual impact. When you stitch this design onto bed sheets, decorative pillows, or cozy blankets, it transforms ordinary linens into personalized heirlooms that tell a story without saying a word.
However, while the aesthetic appeal is undeniable, the process of integrating machine embroidery designs like this one requires a bit more than just hitting "start" on your machine. Many enthusiasts rush into purchasing or downloading these files without understanding the nuances of the layout, the optional elements, or the file compatibility. These oversights can lead to frustration, wasted fabric, and designs that simply do not look right on the final product. To ensure your project turns out beautifully, it is essential to understand what makes this specific design work and how to avoid common pitfalls before you even thread your needle.
Understanding the Anatomy of the Design
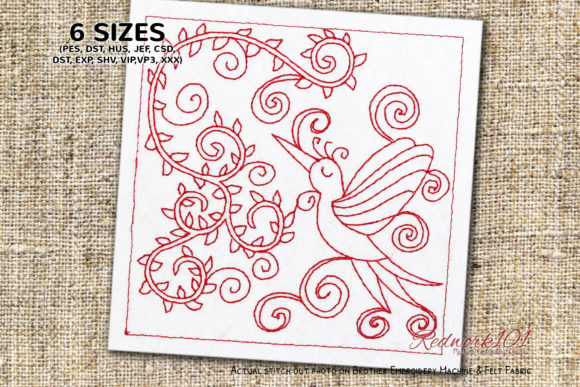
The core of the Flying Bird Redwork Design is the bird itself, rendered in crisp, continuous lines that mimic traditional hand-stitched patterns. This style is beloved for its versatility; because it uses only one color, it blends seamlessly with almost any fabric palette. Whether you are working with a vintage floral sheet or a modern solid-colored duvet cover, the red thread acts as a focal point that draws the eye immediately.
A critical detail often overlooked by beginners is the inclusion of the Box Stitch. As seen in many versions of this pattern, the bird may be framed by a rectangular border. In most commercial setups, this outer box is provided in a different color to define the space. However, this is frequently an optional element intended to frame the motif within a larger monogram or text block. If your goal is a standalone bird motif, keeping this box can clutter the composition and distract from the elegance of the flying figure.
Navigating Color Choices and Machine Settings
One of the most frequent errors made when applying this design is failing to adjust the color sequence in the embroidery machine. The instructions often indicate that the outer box is a different color unless it is an integral part of the design's artistic intent. If you load the file exactly as is, your machine will attempt to stitch that box in a secondary color, which might not match your chosen thread or fabric.
To correct this, you must check the color stop points in your digitizing software or machine interface. If you prefer the clean, unframed look of the bird alone, you should skip the color directly associated with the box. This simple adjustment prevents unwanted stitching that can ruin the balance of the piece. It also saves you time and thread, ensuring that the final result matches your vision perfectly. Remember, the beauty of redwork lies in its minimalism; adding unnecessary elements can dilute the effect.
Common Mistakes That Compromise Quality
Even experienced hobbyists can fall into traps when selecting and executing embroidery projects. One major misunderstanding involves the assumption that all "redwork" designs are identical in their execution. While they share a similar aesthetic, the density of the stitches and the underlying structure vary significantly between files. Using a design intended for heavy canvas on delicate bed sheets can cause puckering, distorting the fabric and ruining the drape of the item.
Another significant issue arises from ignoring the file formats provided. The Flying Bird Redwork Design typically comes with multiple embroidery file formats to ensure compatibility across different brands of machines, such as Brother, Janome, Bernina, and Singer. A common mistake is assuming that a .PES file will work on a Husqvarna Viking machine without conversion, or vice versa. Attempting to force an incompatible format onto a machine can lead to read errors, skipped stitches, or complete failure of the hoop to engage correctly.
- Fabric Mismatch: Failing to stabilize the fabric properly can cause the lightweight threads of redwork to pull the material, creating wrinkles around the bird.
- Thread Tension Errors: Because redwork often uses a single color throughout, tension issues are more visible. If the top tension is too tight, the bobbin thread may show on the surface, breaking the illusion of a single-color line.
- Hoop Placement: Placing the design off-center on a pillowcase or blanket edge can make the finished product look amateurish and unbalanced.
The Impact of Poor Planning on Cost and Satisfaction
When mistakes occur, the cost is not just financial; it is also emotional. There is nothing more disappointing than spending hours preparing a beautiful set of sheets, only to have the embroidery fail due to a skipped step. A poorly executed design can render a gift unusable or a personal project a source of frustration rather than pride. Furthermore, if you are a small business owner selling embroidered goods, quality control is paramount. Sending out a product with visible puckering or incorrect colors can damage your reputation and lead to returns.
To avoid these outcomes, take the time to evaluate the design specifications before purchasing or downloading. Check the stitch count and the recommended fabric weight. Ensure that the file format matches your machine's capabilities. Most importantly, always test the design on a scrap piece of the same fabric you intend to use for the final project. This practice allows you to see how the fabric reacts to the stabilizer and the tension settings without risking your main item.
Maximizing Your Embroidery Experience
Once you have addressed the technical requirements, the focus shifts to presentation. The Flying Bird Redwork Design is particularly effective when used to create themed collections. Imagine a set of coordinating pillows where the bird is stitched in white thread on navy blue fabric, paired with another pillow where the bird is stitched in red on cream. The flexibility of the design allows for creative variations that keep the theme consistent while adding visual interest.
If you are using the optional box stitch, consider how it interacts with other elements on the garment or home decor item. Does the box clash with existing patterns? Is there enough negative space around the design to let it breathe? Sometimes, removing the box entirely creates a more sophisticated look, allowing the bird to appear as if it is flying freely across the fabric rather than being contained within a frame.
For those new to the craft, remember that patience is key. Take your time to hooping the fabric tightly and ensuring the stabilizer is secure. Use high-quality threads designed for machine embroidery to ensure the red color remains vibrant and does not fade quickly after washing. By paying attention to these details, you transform a simple digital file into a cherished piece of art.
In conclusion, the Flying Bird Redwork Design offers a wonderful opportunity to add a touch of classic charm to your home textiles. By understanding the optional nature of the box stitch, managing color sequences effectively, and selecting the correct file formats, you can avoid common errors and achieve professional results. Whether you are a seasoned embroiderer or a beginner looking to start a new hobby, this design provides a rewarding canvas for creativity. With the right preparation and a mindful approach, your stitched birds will soar beautifully on every sheet, pillow, and blanket you create.